There are many ways of decorating eggs but I found that "Pysanky" or Ukrainian Easter eggs are probably the most fun and elaborate. The method is basically layering colors on top of colors and blotting out sections of the design using wax (usually beeswax) which has been heated with a candle. A small funnel shaped wax applicator is needed and can be found in most specialised crafts shops along with all the egg dye colors. Otherwise, you can purchase a ton of materials right on the internet.
The reasoning behind the egg decorating seems to be religious. The symbols used in most traditional Pysanky are based in the Christian faith. If you're interested in knowing more visit Learn Pysanky where they explain alot of the symbology as well as giving hints for making your eggs.
Step one would be to prepare your eggs and your colors. Since the colors should be cool before working, prepare them beforehand. I used mason jars since the opening is large enough to fit the egg (which should not be emptied yet) and a spoon to fish it out. The color preparation is clearly explained on the packets of color. Hot water and vinegar is needed.
Your eggs can be cleaned with a little vinegar to remove any marks or stamped dates. White eggs obviously work better.
After choosing your design (books are available or go on the internet where designs are provided free), you pencil it out carefully.
Here I have penciled in the design and added wax over the areas I want to keep white. Meaning that the wax will now block the area from being dyed any color at all. I then dipped my egg in the yellow dye. Generally you work from lightest less intense colors to darker colors.
 Here is the egg after dipping and drying and another egg penciled out and ready for dipping. Here I am working on some eggs.
And so on. Each time you apply wax you will maintain the color under the wax.
Green and blue....
And here is the egg with the varnish partially removed. There are a few ways you can do this since, if you remember, the egg has not been emptied yet and the last thing you want to do is break it while removing the wax. You can use oil based products (like cornoil heated up a bit) but traditionally it's just a small tea candle, tissues (without the softner in them) and patience. Do not place the egg directly over the candle as it will burst. Just heat the wax until it shines a bit and wipe off. You'll be amazed as the finish design emerges from the black wax.
 The design finally can be seen !
 The design finally can be seen !
 Here are some eggs emptied and waiting their varnishing. Traditionally you're not supposed to empty the egg. They have a special meaning if they still have their innards. But to let them stay intact, you have to rotate your eggs everyday until the insides basically mummify. I have done it so it does work. I also put some eggs in the fridge and didn't touch them for a year and they stayed fine. No smell, no rotting. Otherwise, make a tiny opening at both ends with a needle, twirl the needle inside to break up the yolk, cover the end you're going to blow into with some plastic wrap (otherwise some of the dye may come off on your mouth!) and blow. Course, you can buy an egg blower too but that would remove alot of the fun.
Varnish your eggs with a high gloss varnish. A few coats will do. And let them dry well.
And that's it ! Ok, seems complicated but it isn't really. And the finally results are fantastic.
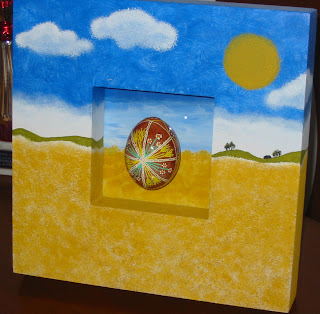
Here are the finished eggs. And here are some eggs which I presented in frames or in little environments.
Happy decorating.


Nessun commento:
Posta un commento